
So, you’ve decided to start a YouTube channel? Whether you’re inspired by your favourite creators or looking to build your personal brand, YouTube is a platform where anyone can turn their passion into a career. But before you can become the next big thing, you’ll need to get your setup right. While it may seem overwhelming at first, starting a YouTube channel doesn’t have to break the bank. In fact, with the right gear, you can start creating high-quality content without spending a fortune.
This blog will walk you through the essential equipment to start a YouTube channel. Let’s get into it!
Camera: The Heart of Your Channel
First things first – you’ll need a camera. The camera is the most important piece of equipment for any YouTuber because it’s what captures your content. But here’s the good news: you don’t need a fancy, expensive DSLR camera to get started. Many successful YouTubers began with what they had on hand – their smartphone.
Smartphones: The Budget-Friendly Option
If you have a smartphone from the last five years, you’re already ahead of the game. Most modern smartphones, whether it’s an iPhone or an Android device, come equipped with cameras that shoot in HD or even 4K. These phones also offer good autofocus and stabilisation features, making them more than capable of producing high-quality video.
To take things up a notch, consider investing in a tripod or stabiliser to keep your shots steady. After all, no one enjoys watching shaky videos. You can also improve your phone’s video quality by adjusting lighting, which we’ll get into later.
DSLR and Mirrorless Cameras: For High-Quality Content
If you want to level up your video quality, investing in a DSLR or mirrorless camera is the way to go. These cameras offer better image quality, depth of field, and flexibility when it comes to lens choices. Some popular models for YouTubers include the Canon EOS M50, Sony ZV-1, or Panasonic Lumix GH5.
These cameras might be more expensive than a smartphone, but if you’re serious about growing your channel, they’re worth the investment. Just make sure to choose one with good autofocus, especially if you’ll be moving around a lot in your videos.
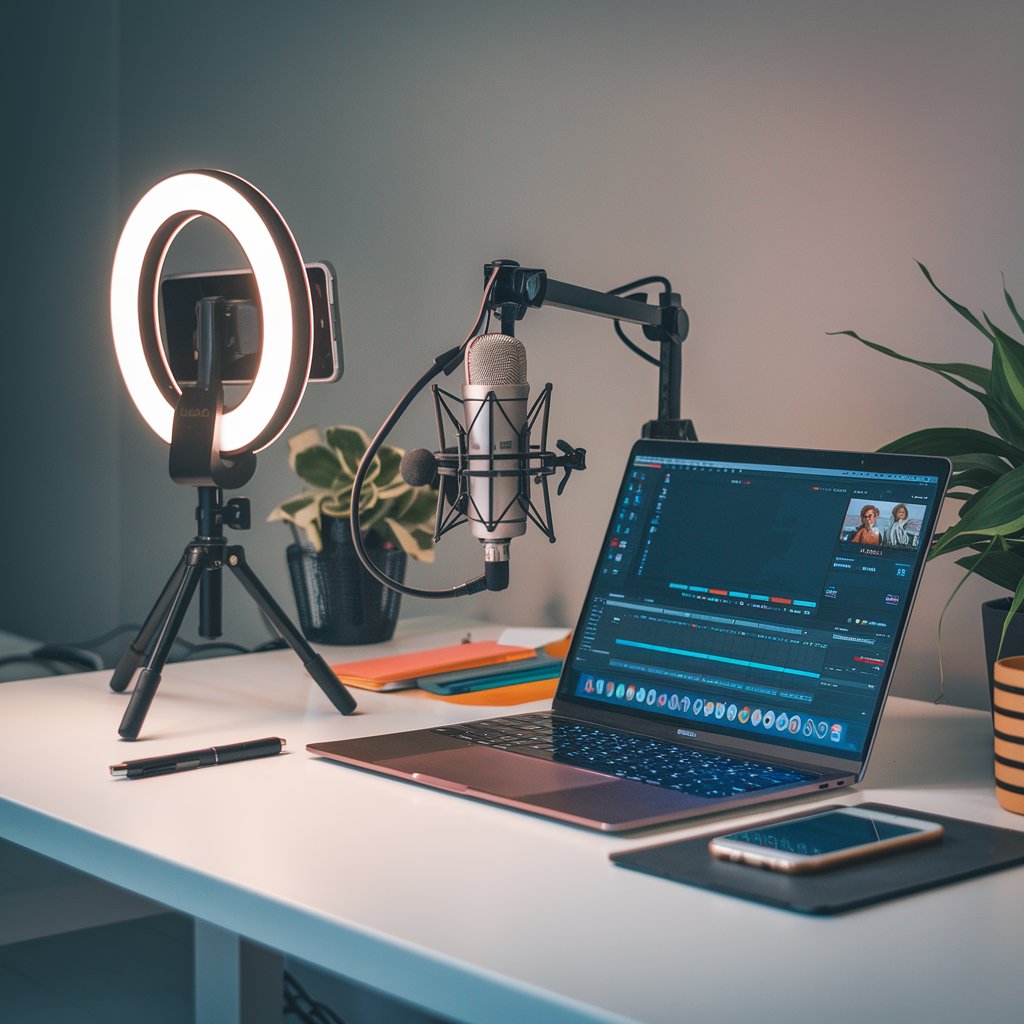
Microphone: Clear Audio is Key
Here’s a pro tip: viewers are more likely to forgive mediocre video quality than bad audio. So, while your camera is essential, your microphone might be even more critical. Clear, crisp audio makes your content more professional and keeps viewers engaged.
Built-in Microphones: A Starting Point
If you’re using a smartphone or a camera with a built-in microphone, that’s fine for now. However, built-in mics tend to pick up a lot of background noise, so upgrading to an external microphone is a smart move once you’re ready to take your channel seriously.
External Microphones: Sound Like a Pro
There are several types of external microphones you can consider, depending on your budget and the kind of videos you’ll be making:
- Lavalier Microphones (Clip-On Mics): These are great for sit-down videos, interviews, or vlogs. They clip onto your clothing and capture clear audio without being in the frame. The Rode SmartLav+ is a popular option for YouTubers.
- Shotgun Microphones: If you’re filming from a distance or in a more controlled environment, a shotgun microphone like the Rode VideoMic Pro is a great option. It attaches to your camera and focuses on the sound directly in front of it, reducing background noise.
- USB Microphones: If you’re recording voiceovers or doing sit-down videos at your desk, a USB microphone like the Blue Yeti is a solid choice. It connects directly to your computer and delivers studio-quality sound.
Lighting: Shine Bright on Camera
Lighting can make or break your video quality, especially if you’re filming indoors or in low light conditions. You don’t need to splurge on expensive lighting equipment, but having a basic lighting setup will instantly make your videos look more professional.
Natural Light: The Free Option
Before spending money on lights, take advantage of natural light. Film in front of a window to get soft, even lighting. Just make sure the light is hitting you from the front, not from behind, or you’ll end up in silhouette.
Ring Lights: The YouTuber’s Favourite
If natural light isn’t an option, ring lights are an affordable and effective alternative. Ring lights provide a soft, flattering light that helps eliminate shadows and makes your videos look crisp. They’re especially popular for beauty and lifestyle channels, but they work well for any type of content.
The Neewer Ring Light is a popular choice for YouTubers, and it won’t break the bank. Most ring lights come with adjustable brightness levels, so you can tweak the lighting depending on your needs.
Softbox Lights: For More Control
If you want to take your lighting to the next level, softbox lights are the way to go. They provide diffused, even lighting that mimics natural light, and they’re great for larger setups. Softbox kits are relatively affordable and easy to set up, making them a great option for home studios.
Tripod: Keep Things Steady
No one likes shaky footage, so having a tripod is crucial. Even if you’re filming with a smartphone, using a tripod ensures stable, professional-looking videos.
Smartphone Tripods: Affordable and Convenient
If you’re filming with your phone, a simple tripod like the UBeesize Smartphone Tripod can do the trick. It’s portable, flexible, and keeps your phone steady whether you’re vlogging, filming tutorials, or sitting down for a chat.
Camera Tripods: Stability for Heavier Gear
For those using a DSLR or mirrorless camera, a more robust tripod like the Manfrotto Compact Action Tripod will provide the stability you need. Look for one that’s sturdy, adjustable, and can handle the weight of your camera.
Editing Software: Where the Magic Happens
You’ve filmed your video, now what? Editing is where your raw footage becomes polished content ready for the world to see. Don’t worry – you don’t need to be a Hollywood-level editor to create great videos. There are plenty of beginner-friendly options out there.
Free Options: Start Simple
If you’re new to editing, free software like iMovie (for Mac users) or DaVinci Resolve (for Windows and Mac) is perfect for beginners. These programs have all the basic features you’ll need to cut, trim, and add transitions or music to your videos.
Paid Options: Level Up Your Editing
If you’re ready to invest in more advanced editing tools, Adobe Premiere Pro and Final Cut Pro are popular choices among YouTubers. They offer a wider range of features, effects, and plugins that allow for more creative flexibility. While they come with a learning curve, they’re worth the investment if you’re serious about creating professional content.
Let’s Summarise
Starting a YouTube channel doesn’t require a ton of expensive gear. With a decent camera (even your smartphone will do), a good microphone, and some basic lighting, you can create high-quality videos that keep viewers coming back for more. As your channel grows, you can invest in more advanced equipment like a DSLR camera, external mics, and softbox lights to level up your content.
Remember, it’s not just about the gear – it’s about creating content that connects with your audience. With the right tools and a bit of creativity, you’ll be well on your way to building a successful YouTube channel.